How I Built My Private AI Assistant under $100* (And You Can Too)
How I Built My Private AI Assistant under $100* (And You Can Too)#
!
No cloud subscriptions. No data leaks. Just my old GPU doing magic.
Total cost: $100 (if you already have a homelab)
The Secret? Your Homelab Does Most of the Work#
I already had a basic homelab running Proxmox with LXC containers. All I needed was a $80 used GPU (NVIDIA GTX 1660 Super) to unlock AI capabilities. If you’re reading this, you likely have:
- A server/NUC/old PC
- Basic virtualization (Proxmox, ESXi, Docker)
- …so your total cost is just the GPU!
My Homelab AI Journey#
Here’s what I started with:
- A used NVIDIA GTX 1660 Super ($80 CAD on Marketplace)
- Proxmox running LXC containers (like lightweight VMs)
- Basic services: Immich (self-hosted Google Photos), Home Assistant
Here’s what I added:
- A new LXC container running Ollama (like ChatGPT for your homelab)
- GPU passthrough to share the 1660 Super between containers
- OpenWebUI (a clean ChatGPT-style interface)
What Your Existing Homelab Can Do#
(Add these AI powers without rebuilding everything)
1. Repurpose That Old GPU#
- My GTX 1660 Super does triple duty:
- 🖼️ Immich Photo Tagging (face detection)
- 📺 Jellyfin Transcoding (4K → 1080p)
- 🧠 Ollama AI Models (Llama 3, DeepSeek)
What My Local AI Actually Does#
(…that you’d normally pay OpenAI or Google for)
1. Your Personal Photo Curator#
- Immich + GPU: Automatically tags faces in family photos
- “Find all pics of Mom from 2018-2020” works offline
- No iCloud/Google Photos privacy worries
2. Obsidian Superpowers#
- My AI notebook assistant:
- “Generate blog post ideas”
- “Organize the docs in markdown format”
- “fill in content for my technical documentation”
- All processed locally – my sensitive tech documentation stay private
3. Home Assistant Brain#
- Voice commands via local Whisper (speech-to-text):
“Turn the bedroom lights to 50% and play jazz” - No Alexa/Google listening in
4. VS Code Copilot#
- Code explanations: “What does this Python script do?”
- Bug fixes: “Why is my Dockerfile failing?”
- All without sending code to Microsoft’s servers
5. Your ChatGPT Clone#
- OpenWebUI interface
- Chat with models like Llama 3 or Deepseek
- Bonus: Teach it inside jokes about your friends
6. AI Art on Demand:#
- Installed Stable Diffusion so I can generate images directly from my homelab—no cloud services needed! Whether for fun, content creation, or generating concept art, it’s an awesome tool to have locally.
“But I’m Not a Tech Genius!”#
My setup took 3 hours – here’s how:
4. GPU Sharing: Passed my 1660 Super to LXC containers (Proxmox makes this easy)
5. Ollama Container: Installed via Docker in 5 minutes (official docs)
6. Models: Downloaded pre-trained ones like typing ollama pull llama3
Total cost:
- GPU: $80 CAD (used) - You can use a more affordable GPU like Quadro M2000 (~ $40)
- Power: ~$2/month extra (GPU idles when not in use)
- Zero new servers bought !!!
5 More Things You Could Do#
(With the exact same setup)
-
Automate Chores:
“Scan my emails for utility bills and summarize costs” -
Game Night Helper:
“Generate trivia questions about 90s cartoons” -
Recipe Wizard:
“Create a meal plan using chicken, rice, and broccoli” -
Learning Buddy:
“Explain quantum physics like I’m 10” -
DIY Netflix:
Auto-generate subtitles for movies using Whisper
How to Steal My Setup (It’s Easy)#
- Get any used GPU (Even a 4GB one works for small models)
- Install Ollama in an LXC/VM
- Connect your apps:
- Home Assistant → REST API
- Obsidian → Text Generator plugin
- VS Code → Continue extension
Why This Beats the Cloud#
- Privacy: My wedding photos aren’t training Meta’s AI
- Cost: $0/month after initial $80 vs. $20/mo for ChatGPT Plus
- Fun Factor: Impress friends with “My garage-built AI”
Your Weekend Project:
- Buy a used GPU
- Install Ollama
- Ask it “How do I automate my coffee maker?”
Welcome to the future.
INSTALLATION STEPS#
Ollama#
Installing Ollama using the ubuntu inside Windows 11 Wsl
Downloading Ollama#
curl -fsSL https://ollama.com/install.sh | sh
Note: You might need to run
Ollama serve
in a terminal to keep the ollama running as below
ubuntu@shield-zephrusG15:~$ ollama serve
2025/01/11 19:37:39 routes.go:1259: INFO server config env="map[CUDA_VISIBLE_DEVICES: GPU_DEVICE_ORDINAL: HIP_VISIBLE_DEVICES: HSA_OVERRIDE_GFX_VERSION: HTTPS_PROXY: HTTP_PROXY: NO_PROXY: OLLAMA_DEBUG:false OLLAMA_FLASH_ATTENTION:false OLLAMA_GPU_OVERHEAD:0 OLLAMA_HOST:http://127.0.0.1:11434 OLLAMA_INTEL_GPU:false OLLAMA_KEEP_ALIVE:5m0s OLLAMA_KV_CACHE_TYPE: OLLAMA_LLM_LIBRARY: OLLAMA_LOAD_TIMEOUT:5m0s OLLAMA_MAX_LOADED_MODELS:0 OLLAMA_MAX_QUEUE:512 OLLAMA_MODELS:/home/ubuntu/.ollama/models OLLAMA_MULTIUSER_CACHE:false OLLAMA_NOHISTORY:false OLLAMA_NOPRUNE:false OLLAMA_NUM_PARALLEL:0 OLLAMA_ORIGINS:[http://localhost https://localhost http://localhost:* https://localhost:* http://127.0.0.1 https://127.0.0.1 http://127.0.0.1:* https://127.0.0.1:* http://0.0.0.0 https://0.0.0.0 http://0.0.0.0:* https://0.0.0.0:* app://* file://* tauri://* vscode-webview://*] OLLAMA_SCHED_SPREAD:false ROCR_VISIBLE_DEVICES: http_proxy: https_proxy: no_proxy:]"
time=2025-01-11T19:37:39.579-05:00 level=INFO source=images.go:757 msg="total blobs: 0"
time=2025-01-11T19:37:39.579-05:00 level=INFO source=images.go:764 msg="total unused blobs removed: 0"
[GIN-debug] [WARNING] Creating an Engine instance with the Logger and Recovery middleware already attached.
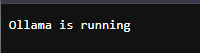
Then go to the browser and try http://localhost:11434
You should be able to see
!
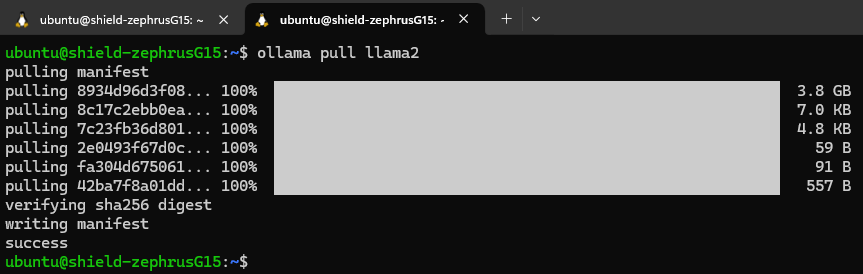
Running a llama2 model#
Ensure that Ollama is running in the other terminal. In a new terminal enter the command
ollama pull llama2
and wait for it to download it fully
!
Install docker#
Run the following command in the terminal
# Add Docker's official GPG key:
sudo apt-get update
sudo apt-get install ca-certificates curl
sudo install -m 0755 -d /etc/apt/keyrings
sudo curl -fsSL https://download.docker.com/linux/ubuntu/gpg -o /etc/apt/keyrings/docker.asc
sudo chmod a+r /etc/apt/keyrings/docker.asc
# Add the repository to Apt sources:
echo \
"deb [arch=$(dpkg --print-architecture) signed-by=/etc/apt/keyrings/docker.asc] https://download.docker.com/linux/ubuntu \
$(. /etc/os-release && echo "$VERSION_CODENAME") stable" | \
sudo tee /etc/apt/sources.list.d/docker.list > /dev/null
sudo apt-get update
#Install Docker
sudo apt-get install docker-ce docker-ce-cli containerd.io docker-buildx-plugin docker-compose-plugin
After installing docker, you’ll have to keep the docker running. To do that run
sudo dockerd
Run Open WebUi Docker Container#
docker run -d --network=host -v open-webui:/app/backend/data -e OLLAMA_BASE_URL=http://127.0.0.1:11434 --name open-webui --restart always ghcr.io/open-webui/open-webui:main
Open the open-webui#
Go to http://localhost:8080
Create a user id and you’ll be able to see the llama2 model and interact with it
!
Stable diffusion (Optional)#
Prereqs#
Pyenv#
#Install Pyenv prereqs
sudo apt install -y make build-essential libssl-dev zlib1g-dev libbz2-dev libreadline-dev libsqlite3-dev wget curl llvm libncurses5-dev libncursesw5-dev xz-utils tk-dev libffi-dev liblzma-dev git
#Install Pyenv
curl https://pyenv.run | bash
#Install Python 3.10
pyenv install 3.10
Note: if the pyenv doesn’t work; then add the following lines to .bashrc file
nano ~/.bashrc

export PATH="~/.pyenv/bin:$PATH"
eval "$(pyenv init -)"
eval "$(pyenv virtualenv-init -)"
source ~/.bashrc
#Make it global
pyenv global 3.10
Install Stable Diffusion#
wget -q https://raw.githubusercontent.com/AUTOMATIC1111/stable-diffusion-webui/master/webui.sh
Make it executable#
chmod +x webui.sh
#Run it
./webui.sh --listen --api
open http://localhost:7860
Note: In case there are errors like - you can’t run this with root; then do this:
bash ./webui.sh -f --listen --api --no-half --disable-nan-check
Final Thoughts: Embrace the Adventure!#
Building a local AI stack isn’t just a technical upgrade—it’s a creative journey that transforms your homelab into a smart, responsive, and downright fun playground. With a bit of ingenuity, a dash of DIY spirit, and some affordable hardware upgrades, you can unleash an AI powerhouse that not only simplifies your life but also sparks endless inspiration. So, gear up, dive in, and let your local AI stack be the catalyst for your next big project! Happy tinkering, and may your homelab adventures be as exciting as they are innovative!